This article details tasks to create a multi project solution template in Visual Studio
I use a solution template in my Visual Studio extension containing 4 projects and a connection already configured for connecting and deploying to dynamics. This gets me up and running quickly and provides various class libraries immediately to reduce coding effort
Getting a solution template with more than 1 project required some learning so this article documents the process. So let’s go through it
Create Project Template
The first step is creating a project template in Visual Studio. The project created by default will be for a solution with only one project, but we will subsequently modify its configuration to reference multiple projects
This is the option in the new Project Menu in Visual Studio 2017. You may need Visual Studio Extensibility installed for Visual Studio

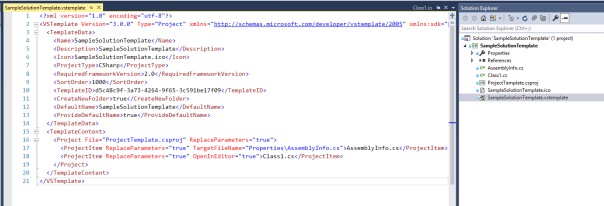
This screenshot shows the default project created by Visual Studio along with its .vstemplate file
Note
- Type = Project – we will change this to ProjectGroup
- TemplateContent contains one Project Node – we will change this to a ProjectCollection and add ‘child’ project templates within the solution directory
Create Child Projects From Unzipped Project Templates
Next step is to export the projects we want inside the solution as project templates, unzip them, then add them within the directory of our solution template. For the purpose of this article I will add 2 basic new class library projects created by Visual Studio
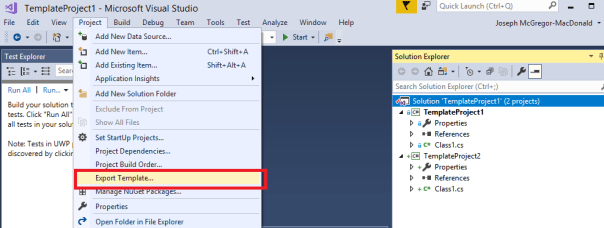
This screenshot demonstrates. I have a solution with 2 basic class libraries open. To initiate a template export I select Export Template in the Project menu
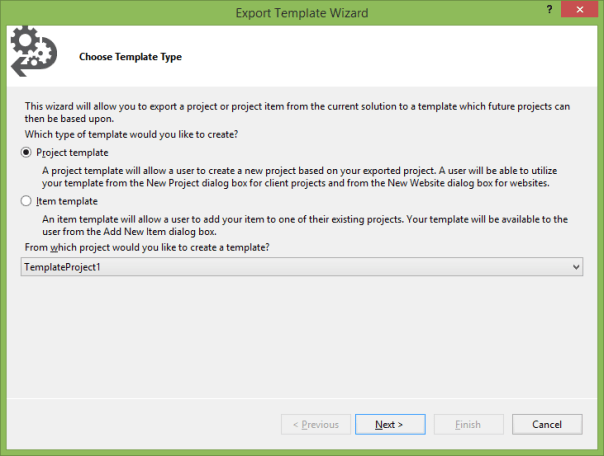
Ensure Project Template selected along with the relevant project
Ensure “Display in explorer window…” is checked then click Finish

Visual Studio will create a zip file for the template content and open the folder containing the zip. Unzip then copy the unzipped folder into the directory of our solution/project template created earlier. This screenshot shows the unzipped folder to be copied

Repeat this for the other project
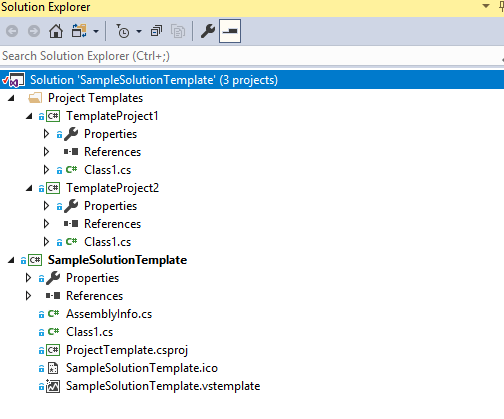
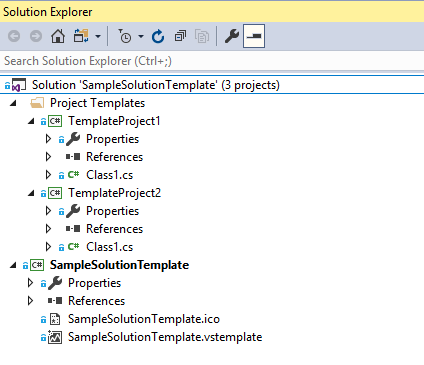
This screenshot shows the solution directory having copied in the unzipped project templates

At this point we add the child projects into the solution. This is done by using the Add -> Existing Project menu option and selecting the .csproj file within the unzipped template folders. Here I add them in a solution folder named Project Templates
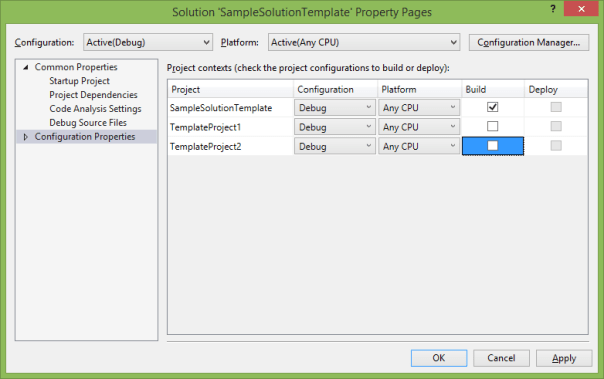
Note we should configure these projects to not build as part of the solution configuration. The template projects contain various placeholders within their files which cause sbuilds to fail for them
To configure these properties right-click the solution in solution explorer and select properties. Then uncheck build for the projects and Apply
Change our Project Template to a Project Group Template
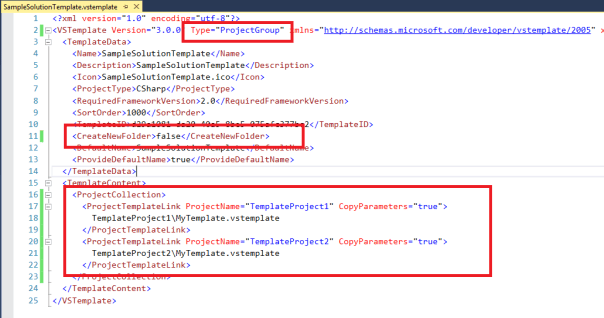
The remaining task is to reconfigure the .vstemplate in the main template project. This screenshot highlights changes. The main 2 being
- Changing the Type to a project group (i.e a solution with multiple projects)
- Changing the template content to a collection of projects referencing the unzipped templates we earlier copied
At this stage we may also delete the superfluous files which were created as part of the default project template. This is the result
Build project and copy zip output to Templates folder
Okay now lets build our SampleSolutionTemplate. the .zip output is shown in the screenshot below. This is what Visual Studio uses for creating a new solution for the template

To have this available in visual studio copy it into the Templates folder. This templates folder shown is the personal templates folder in My Documents
Note I have put it in the folder path Visual C#/Sample which drives where it is displayed in the new Project menu

Create new Solution from Template
Okay let’s do it. Open a new instance of Visual Studio then click File -> New Project
In the Visual C# navigation there is a new Sample option which contains my Solution Template

When created the new Project contains the desired projects

Obviously this is a basic example but if frequently working on the same software platform having a solution template saves significant set up time when starting on new work
Also note when solution templates are included in Visual Studio extensions further manipulation may be done in ‘Wizards’ when provisioning the projects. Options include forms for capturing project data, adding dynamic content for tokens in the templates and modification/adding items within the solution. An example of this is in my extension JosephM.Xrm.Vsix in the github repository here
If required I have added the sample template created in this article to a github repository here
That’s all folks. Hope this helps someone
